Air Fryer Cooking Times: Why They Vary Between Models
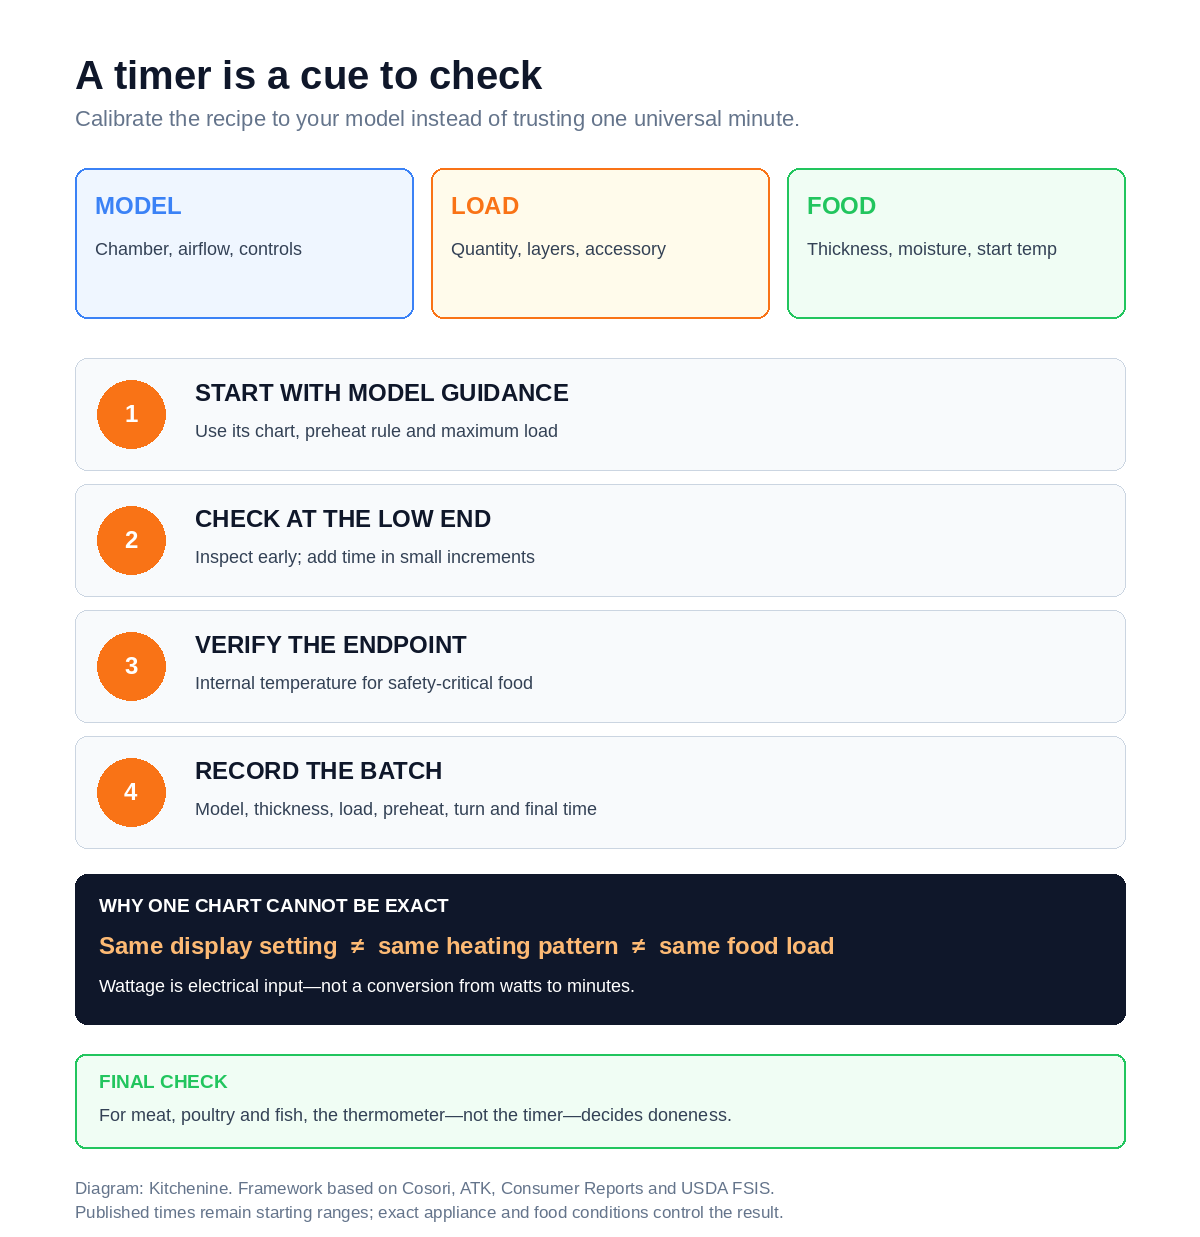
Air fryer cooking times vary between models because the number on the display does not describe the entire heating system. Chamber size, airflow, heating-element control, temperature increments, preheating, basket load and food thickness all change how quickly heat reaches the centre of the food.
Treat every published time as a starting range. Check at the low end, record what your model needed, and use internal temperature not the timer to decide whether meat, poultry or fish is safe.
Why the same setting does not produce the same cook
| Variable | What changes | Likely effect on time |
|---|---|---|
| Chamber and basket shape | Distance from food to element and usable surface area | Smaller, less crowded loads often finish sooner |
| Airflow design | How quickly moist air is removed from the food surface | Stronger exposure can accelerate drying and browning |
| Temperature control | How the element cycles around the selected setting | Two displays can produce different heating patterns |
| Preheat state | Whether food starts in a hot or cold chamber | Short cooks are affected more than long cooks |
| Basket load | Air access and total cold mass | More food usually extends and destabilises the time |
| Food thickness and temperature | Distance heat must travel and starting energy | Thicker or colder pieces need longer |
1. The selected temperature is a control target, not a food temperature
An air fryer’s thermostat switches the heating element on and off to control heat in a moving-air chamber. The display shows the selected target, not a continuous measurement at the centre of your chicken breast or beneath a pile of fries.
Models also offer different temperature increments. America’s Test Kitchen notes that controls may move in steps of 10, 25 or even 30 degrees. A recipe written for 375 °F may therefore be cooked at 370, 380 or 400 °F depending on the available setting. Its guidance is to choose the closest available temperature and check at the low end of the recipe’s time range.
That small control difference combines with fan behaviour, element placement and basket geometry. The result is why a transferable range is more honest than a single exact minute.
2. Wattage tells you electrical input, not cooking speed
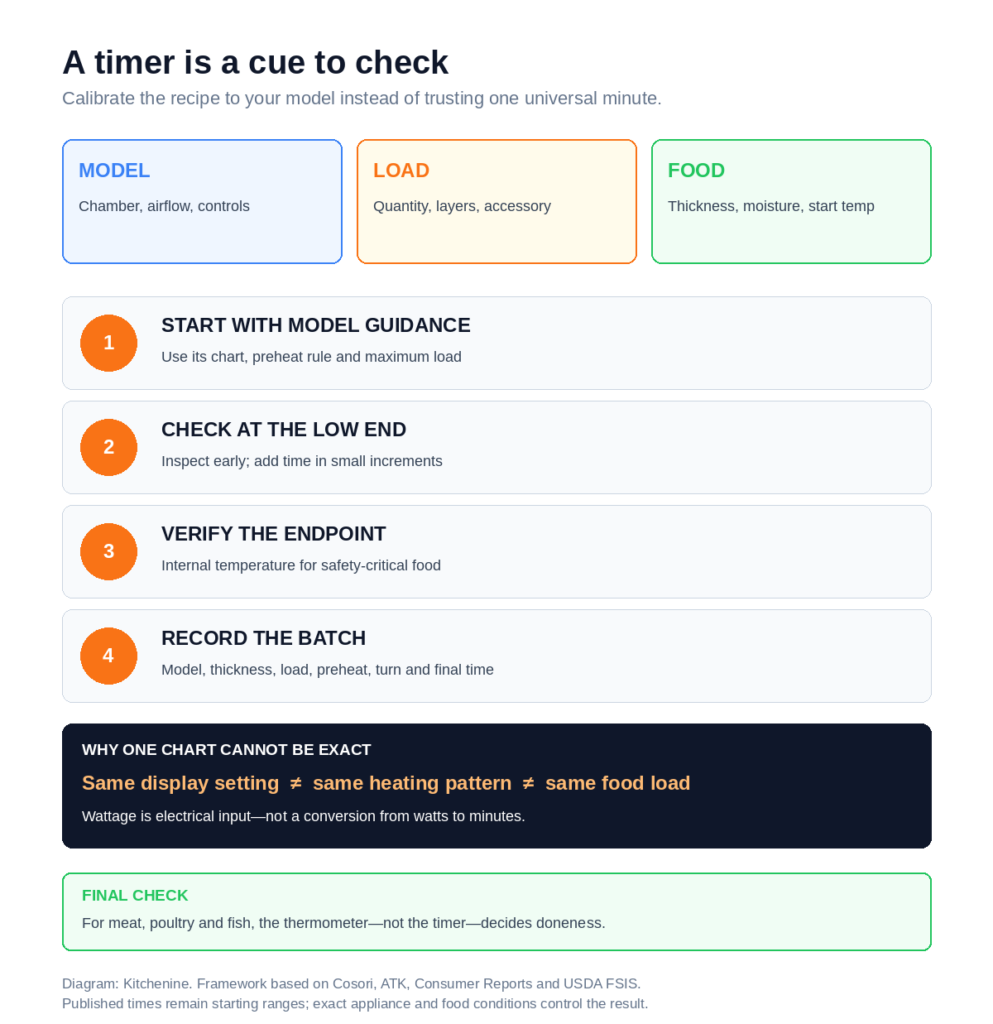
A higher wattage rating means the appliance can draw more electrical power at full load. It does not tell you how often the element cycles, how much metal and air must heat, how effectively the fan moves heat to the food, or how much food is in the basket.
A high-powered large model can spend that input heating a larger chamber. A lower-powered compact model may have less volume to heat. Comparing wattage without chamber size and load is like comparing engines without vehicle weight.
Wattage is useful for estimating electricity use, but even that requires actual operating time. See do air fryers use a lot of electricity? for measured kilowatt-hours rather than nameplate shortcuts.
3. Model-specific charts are intentionally model-specific
Cosori’s cooking chart is calibrated for its Iconic model and directs owners of other Cosori products to the recipe book or product page for that model. It also warns that wattage, chamber size and airflow design vary, so a generic chart will not deliver identical results in every appliance.
Even within one model’s chart, the ranges are broad. Its frozen thin-cut fries are listed at 14–18 minutes, thick-cut fries at 16–22, and fish fillets at 8–16 depending on type and thickness. A four- or eight-minute range is not imprecision; it acknowledges variables the timer cannot see.
Use the chart that came with your appliance before a generic magnet, social post or recipe written around an unidentified model.
4. Preheating changes the starting line
A recipe timed from a hot chamber is not directly comparable with one timed from a cold start. Cosori specifies a three-minute preheat for most foods in its Iconic model because its chart assumes that starting condition. Other models and recipes may be designed for a cold start.
Do not impose one brand’s preheat rule on every air fryer. Read the recipe and manual together. If the time repeatedly runs short or long, confirm whether the published method included preheating before changing the temperature.
5. Load changes both airflow and thermal mass
Adding food does two things at once: it adds cold mass that must be heated and blocks some of the air path. A single layer of small pieces behaves differently from the same weight stacked into a deep pile.
Consumer Reports warns that overfilling prevents hot air from reaching all the food, slows cooking and can produce uneven, soggy results. Cosori similarly says a full basket reduces airflow and extends cooking time.
If the result is uneven rather than simply slow, use the controlled test in why food cooks unevenly in an air fryer. Adding minutes to an overcrowded basket may burn exposed pieces before shielded pieces are ready.
6. Thickness matters more than the food name
“Chicken breast” is not a reproducible unit. Two pieces can have the same weight but different maximum thickness. Heat must travel farther to reach the centre of the thicker piece, while its surface continues browning.
Cosori’s model-specific chart separates thin-cut boneless breasts from thicker breasts and gives different ranges. It also distinguishes half-inch salmon from one-inch salmon. Those categories are more useful than one time for “chicken” or “fish.”
Frozen state and surface ice add another variable. Moisture released into a crowded basket can turn the first part of the cycle into steaming rather than crisping.
How to calibrate a recipe to your air fryer
- Start with the model manual. Use its chart, preheat rule and maximum load.
- Match the recipe conditions. Note fresh or frozen state, thickness, quantity, arrangement and whether food was turned.
- Set the closest available temperature. Do not chase a setting your controls cannot produce.
- Check at the low end of the range. Add time in small increments rather than committing to the upper limit unseen.
- Use the correct doneness signal. Texture and colour for vegetables; internal temperature for safety-critical foods.
- Record the result. Save model, food weight, maximum thickness, load, temperature, preheat state, turning schedule and final time.
On the next cook, change only one variable. Your first successful batch becomes a model-specific reference that is more valuable than a universal chart.
A simple first-batch log
| Record | Example format |
|---|---|
| Model | Brand + exact model number |
| Food | Type, weight and maximum thickness |
| Starting condition | Fresh, refrigerated or frozen |
| Basket arrangement | One layer, quantity, liner/rack |
| Program | Temperature, mode and preheat |
| Intervention | Turned or shaken at minute X |
| Endpoint | Internal temperature or texture |
| Final time | Minutes from food insertion |
When a timing difference may indicate a problem
Normal variation does not mean every result is acceptable. Investigate when a familiar recipe suddenly takes much longer under the same measured conditions.
- Confirm the crisper plate and basket are installed correctly.
- Clear exterior intake and exhaust vents.
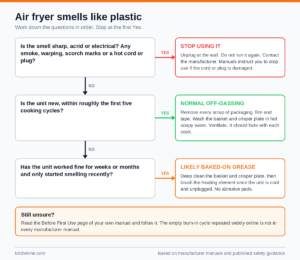
- Check for heavy grease around the heating area using the manual’s cleaning procedure.
- Repeat with a small, known load and no optional liner or rack.
- Contact the manufacturer if the fan sounds abnormal, heat becomes intermittent, an error code appears or a controlled recipe no longer reaches safe temperature.
Do not open the electrical housing or attempt to recalibrate an undocumented thermostat adjustment.
Safety: the timer is never the final test
USDA says poultry must reach 165 °F, ground meat 160 °F, fish 145 °F, and whole cuts of beef, pork, veal and lamb 145 °F followed by a three-minute rest. Measure the thickest part without touching bone.
A browned surface does not prove the centre is safe. This matters most when the basket is crowded, pieces differ in thickness, or a frozen product contains raw meat. Follow package instructions for raw stuffed breaded chicken products; USDA specifically says not to cook those in an air fryer.
What this article cannot tell you
- The exact correction factor between two unidentified models.
- The actual air temperature inside your appliance without appropriate measurement equipment.
- Whether a longer time is caused by element cycling, airflow, voltage, sensor behaviour or food conditions.
- A universal conversion from wattage to minutes.
- A safe endpoint for meat based on colour, crispness or elapsed time alone.
Frequently asked questions
Why does my new air fryer cook faster than my old one?
The new model may have a smaller effective chamber, different fan or element control, a wider basket, or a different preheat assumption. Recalibrate using the low end of the recipe range.
Can I use one air fryer time chart for every brand?
Use it as a starting point only. Prefer the chart for your exact model, then record the result for your usual quantity and food thickness.
Does a higher-wattage air fryer always cook faster?
No. Wattage describes maximum electrical input, not chamber size, airflow efficiency, thermostat cycling or load. Those variables determine how the input reaches the food.
Should I always preheat?
No universal rule applies. Use the preheat condition assumed by your model’s chart or the recipe. Short, texture-sensitive cooks are more affected by the starting condition.
How early should I check food?
Check at the low end of a credible time range. For a new model or unfamiliar food, inspect earlier if the surface is browning rapidly, then add time in small increments.
Sources: Cosori Iconic Air Fryer Cooking Times Guide (model-specific chart and variables); America’s Test Kitchen, Air Fryer 101 (14 August 2024); Consumer Reports, How to Get the Most From Your Air Fryer (updated 5 February 2024); and USDA FSIS, Air Fryers and Food Safety (updated 24 June 2024). Cosori sells air fryers; its chart is used only for the model-specific ranges and limitations it publishes, not as an independent comparison of brands.